
When you send an agreement by text, the signing link can show a preview card on the signer's phone: an image, a title, and a short description. You choose what that card says, so the signer knows the text is from you before they tap it.
Open the link preview settings
- Open eSign from the sidebar and stay on the Home tab.
- Click eSign settings.
eSign settings open in a popup over the Home tab. The list on the left jumps to each section: Email, Text message, Completion, and Reminders. On a phone, the sections are a strip you can scroll across the top. One Save at the top saves every section at once, and Reset to default resets all of them. If you close the popup with changes you haven't saved, you're asked whether to discard them.
The Link preview card, in the Text message section, shows what your signing links use now. A Default badge means you haven't changed anything yet. The built-in card uses a plain document image, the title "{sender_name} sent you a document to sign", and the description "Tap to review and sign securely."
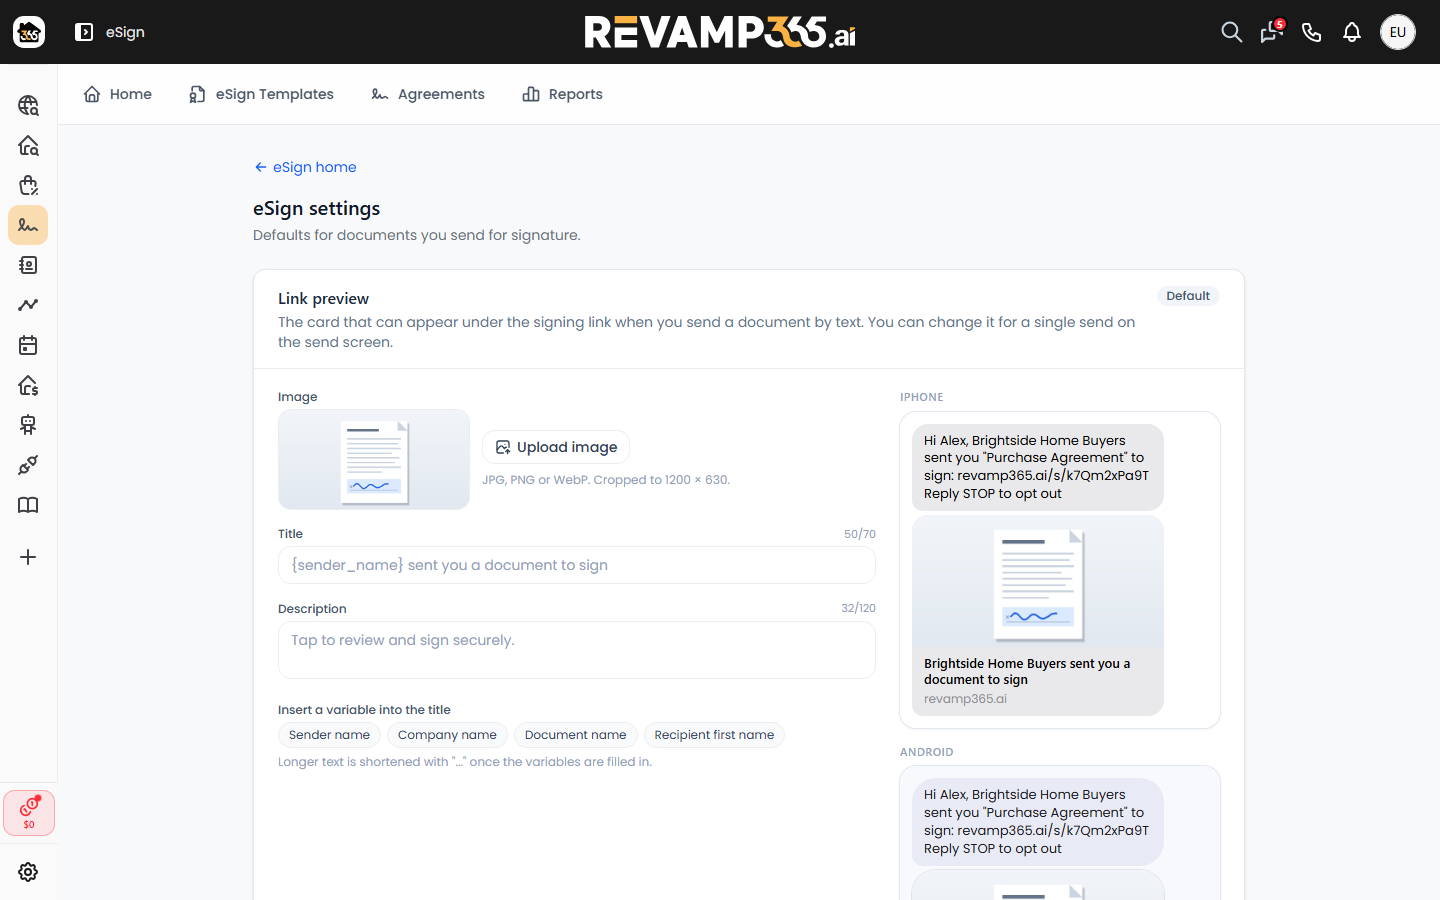
The document name is left out of the built-in card on purpose, so a property address never shows up in a preview. You can add it yourself with a variable if you want it there.
Add your own image
- Click Upload image and choose a JPG, PNG, or WebP file.
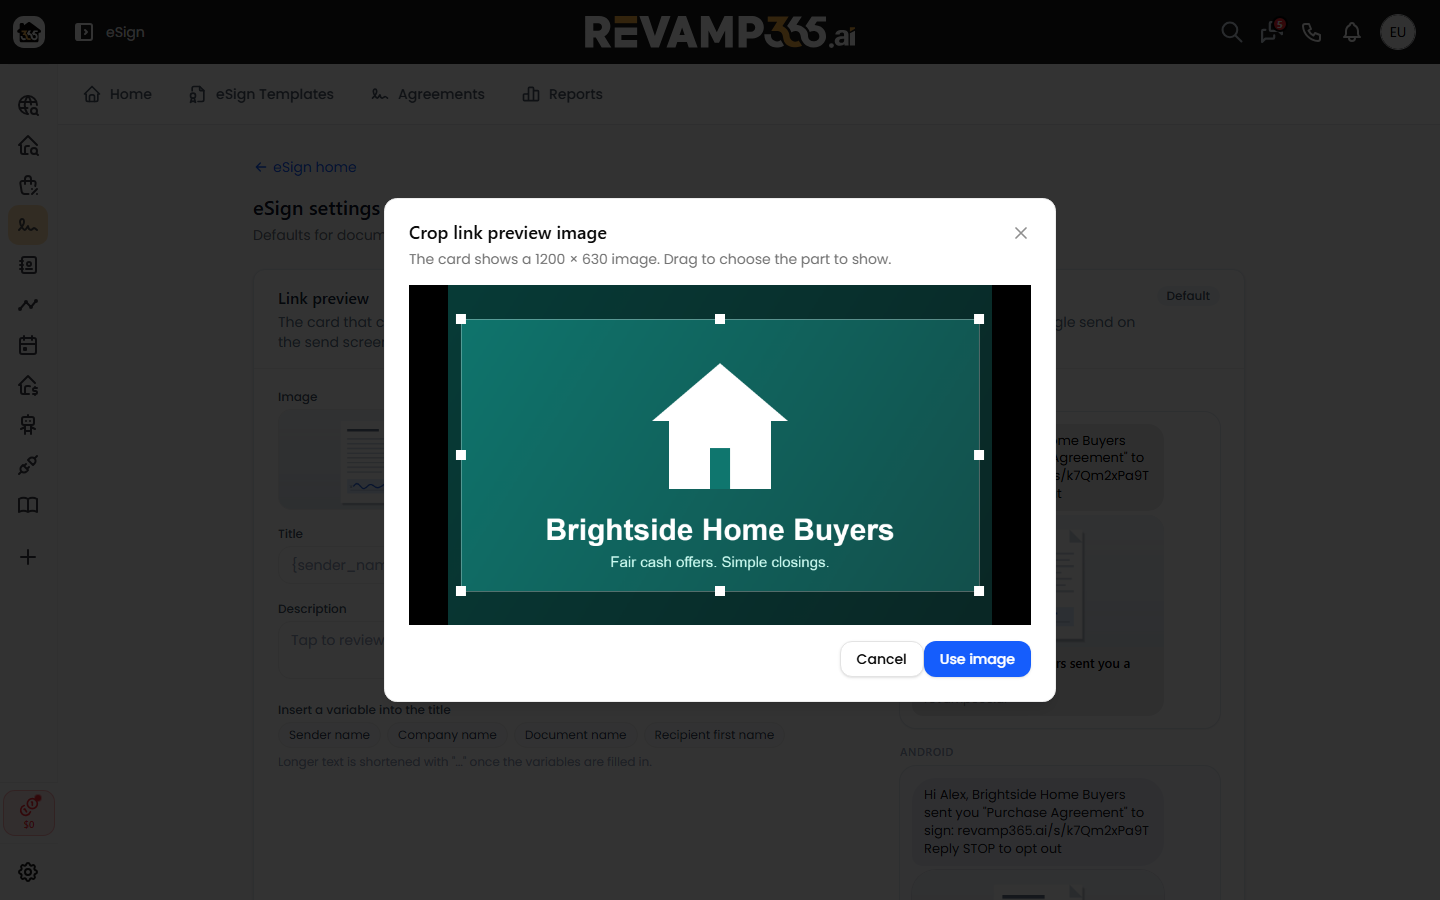
- In Crop link preview image, drag the frame to pick the part to show. The card uses a wide 1200 × 630 image.
- Click Use image.
To change it later, click Replace image. Remove goes back to the built-in image.
Write the title and description
Type your own Title and Description. To insert a detail that changes with each send, click in the field, then click a variable:
| Variable | What it fills in |
|---|---|
| Sender name | Your company name, or your name if you haven't set a company |
| Company name | Your company name, or your name if you haven't set a company |
| Document name | The name of the document you're sending |
| Recipient first name | The signer's first name |
The counters above each field show the length after the variables are filled in: up to 70 characters for the title and 120 for the description. Longer text is shortened with "..." when it's sent. The iPhone and Android previews on the right update as you type, using sample values.
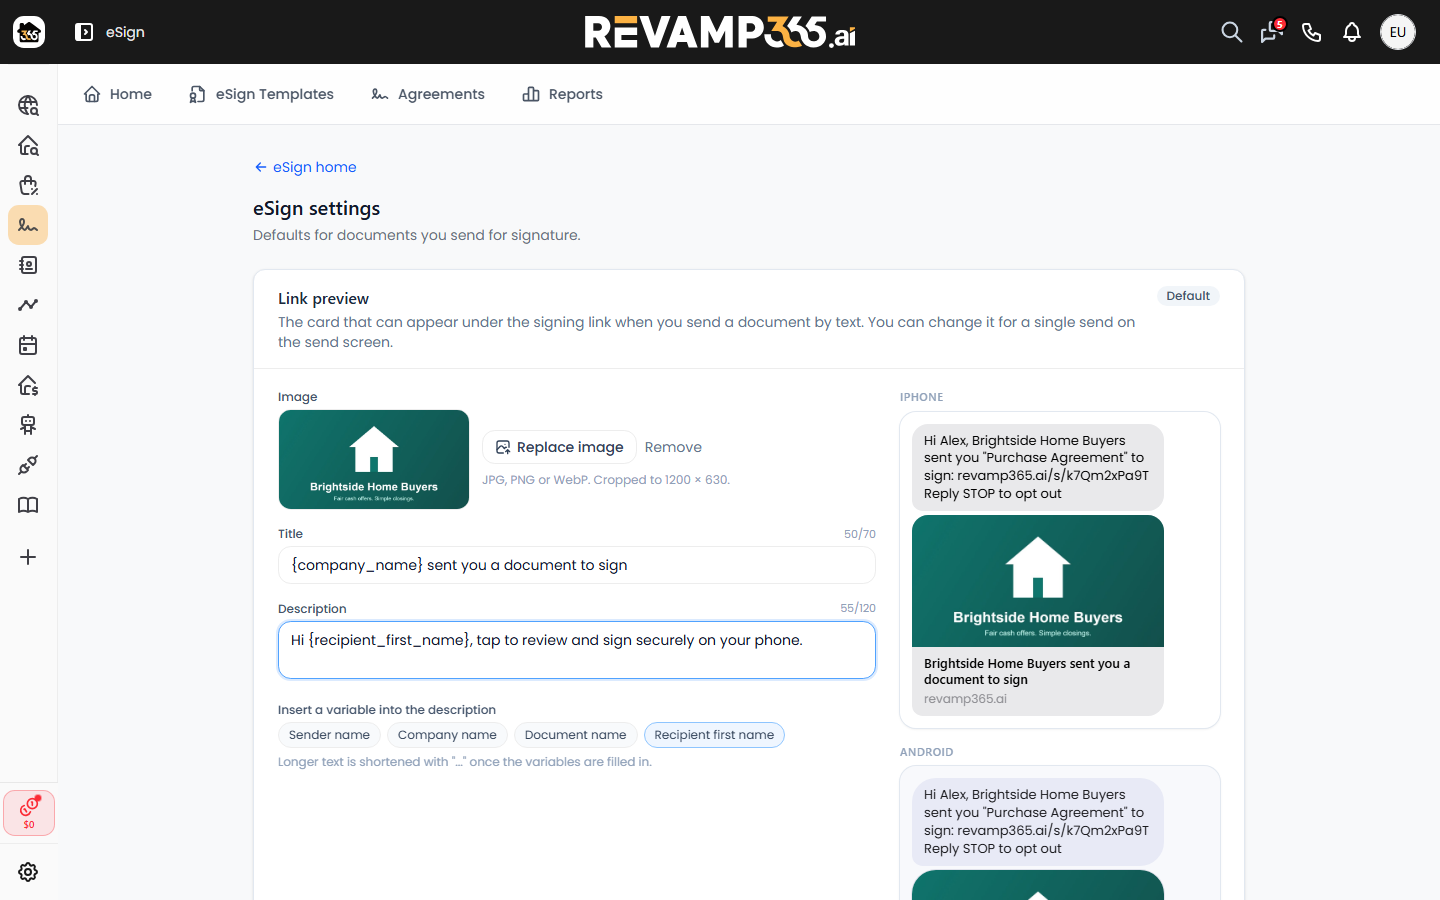
Click Save. The badge changes to Custom, and every document you send by text from now on uses your card. Reset to default goes back to the built-in card.
Customize the signing email
The same settings popup sets the email your signers receive. Email is the first section, above the text message and link preview.
- Type a Subject (up to 200 characters) and a Message (up to 2,000 characters). To insert a detail that changes with each send, click in either field, then click a variable. They're the same variables as in the table above.
- Check the email preview next to the fields. It shows the email the way a signer sees it, using sample values, and keeps the line breaks you type.
- Click Save. It saves the email together with the rest of your settings.
Leave a field blank to use the built-in text: the subject "Please sign: {document_name}" and the message "Please review and sign the following document." The greeting, the document name, the Review & Sign Document button, and the expiry line are always included, so every email has a working signing link.
On the send screen, the Email Message card starts from your saved subject and message, with the variables still showing. Changing it there affects that send only. Each document keeps the email it had when you sent it, so the next signers in the order and any resend get the same wording even if you change your settings later. Reset to default clears the email along with the text message, link preview, completion text, and reminders.
Set up signing reminders
Reminders go to signers who haven't signed yet, the same way they got their signing link: by email, text, or both. Set them up in the Reminders section.
- Send reminders: turns reminders on or off. It applies to every agreement, including ones already sent. The other reminder settings grey out while it's off.
- First reminder, then every: 1 to 14 days. The first reminder goes that many days after the signer got their link, never the same day. Each one after that waits the same number of days.
- Up to: 1 to 5 reminders per signer.
- Send at: 8 AM to 7 PM, in each signer's local time. That comes from the signer's phone number, or your account's time zone for a signer with no phone number. A reminder never goes out before 8 AM or after 9 PM where the signer could be. If the hour you pick falls outside that window for them, the reminder goes at the next time that's open.
Out of the box, reminders are on: the first goes two days after the signer got the link, then every two days, up to three reminders, at 10 AM the signer's time.
Write the reminder text and email
Reminder text is the message before the link, up to 100 characters, with the same variables as above. The signing link and "Reply STOP to opt out" are always added after it, and the preview shows the whole text. Leave it blank to use the built-in text, which names the document and you, like this: Reminder: "Purchase Agreement" from Your Company is waiting for your signature, followed by the link.
Reminder email has a subject and a message, with the same limits and variables as the signing email. Leave them blank to use the built-in subject "Reminder: Please sign — {document_name}" and the message "This is a reminder that the document {document_name} still requires your signature." The greeting, the Sign Now button, and the expiry line are always included. Reminder emails go out under your account's name, and replies go to your account's email.
Changes to reminders apply to agreements that are already out, starting with their next reminder.
Change reminders for one send
On the send screen, a Reminders row starts from your settings, for example "Send reminders · every 2 days · up to 3". Uncheck it, or pick a different number of days or reminders, to change them for that agreement only. The send time and the wording always come from your settings. If you leave the row alone, the agreement follows your settings, including any changes you make later.
Stop reminders on one agreement
The agreement shows its schedule, for example "Reminders: every 2 days, up to 3, at 10 AM signer time", and each signer shows how many reminders they've had and when the next one goes, such as "Reminded 1 of 3 · next Mon 10:00 AM".
Click Stop reminders to stop them for that agreement. A reminder text that was waiting to go out is cancelled too. Resume reminders starts them again from the signer's last link or reminder. If one is already overdue, it goes out at the next time that's inside the signer's hours. Resending a signer's link also restarts their reminder countdown, without resetting how many they've had.
Change the card for one send
On the Signers step of a new document, a Link preview row appears as soon as a signer is set to Text or Both. It reads Your default until you change it.
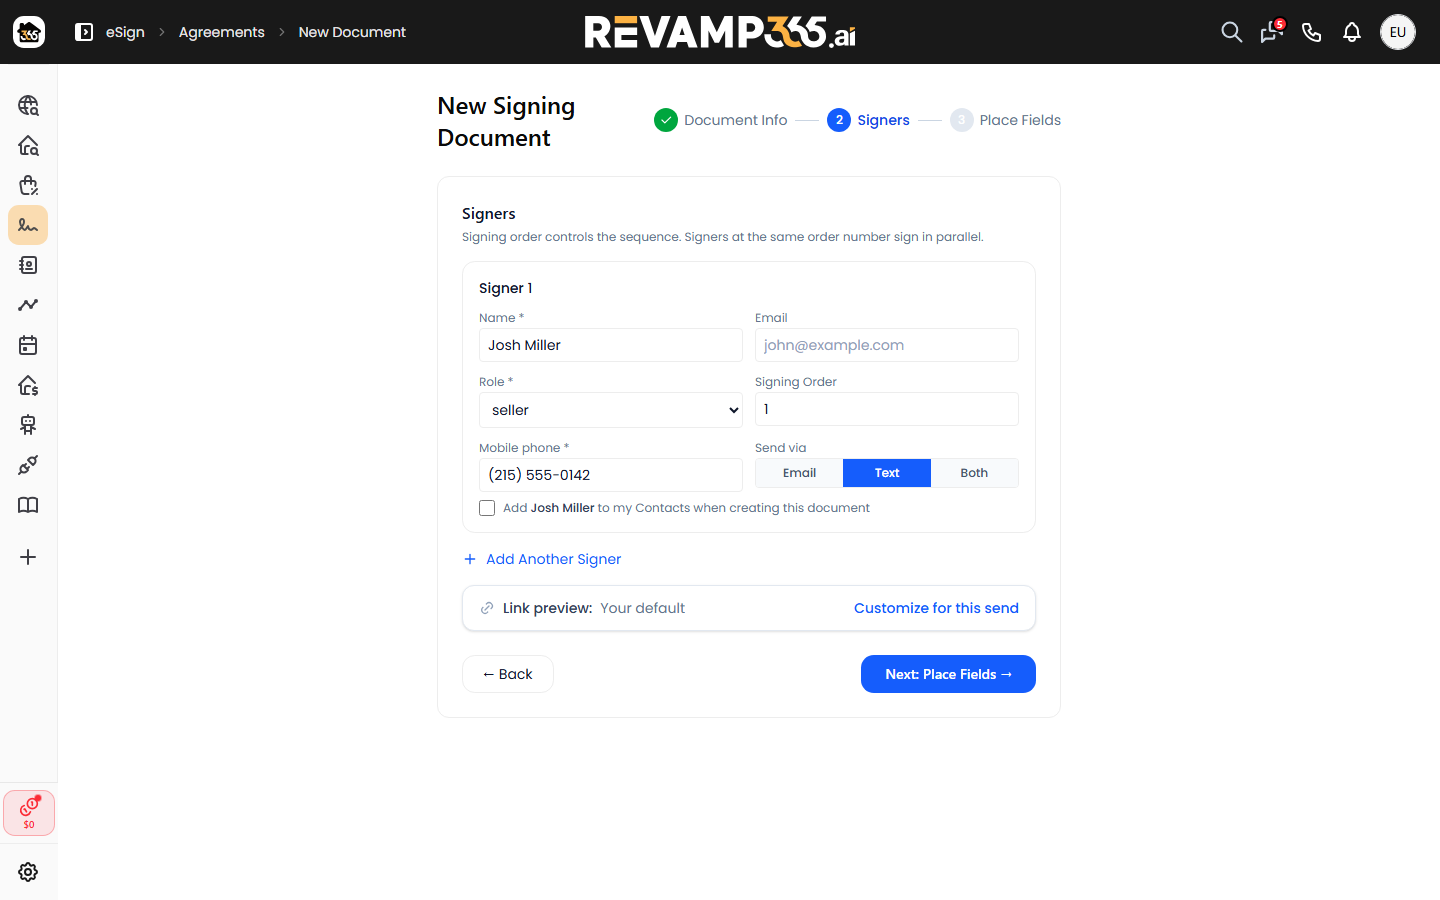
- Click Customize for this send. The editor opens with your saved card filled in.
- Change the image, title, or description. The previews use this document's real name and the signer's first name.
- Click Done. The row now reads Customized for this send.
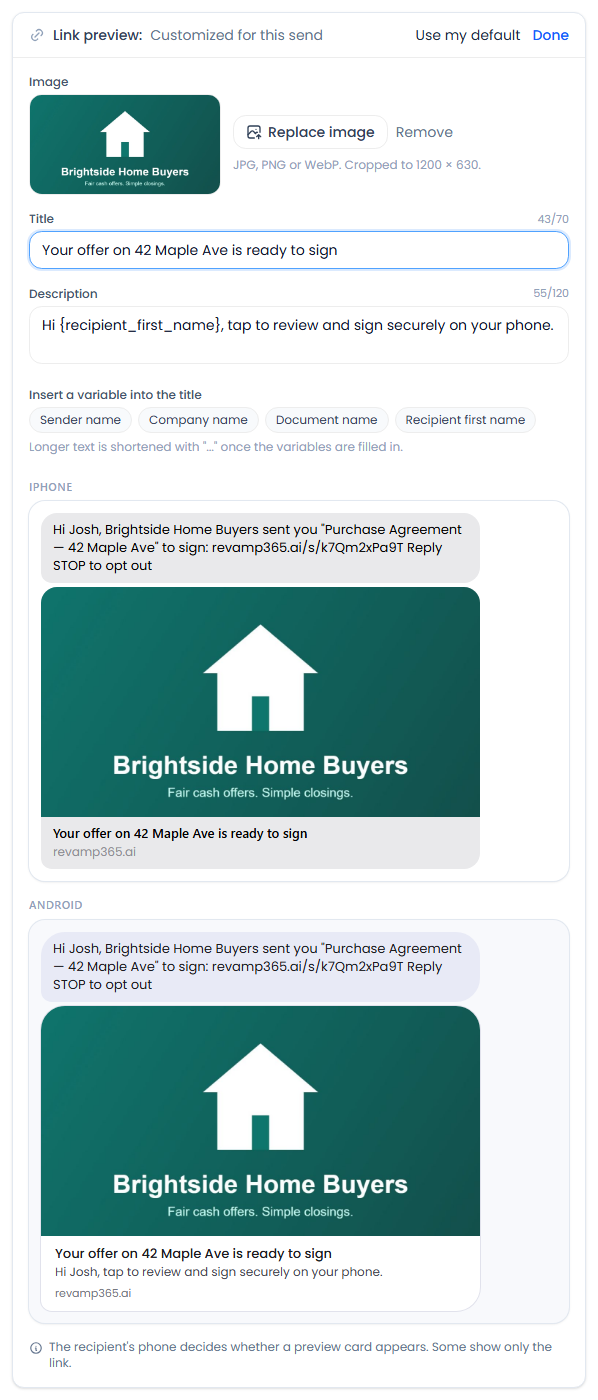
Use my default throws away the changes for this send. Your saved card in eSign settings isn't affected either way.
Whether a preview card shows up
The signer's phone decides whether to show a preview card at all. Some phones and messaging apps show only the link. Others wait until the signer taps, such as an iPhone showing "Tap to Load Preview" for a number that isn't in their contacts. The text and the link work the same either way, so the card is a nice touch, not something the signer needs.
Once everyone has signed, a link from the completion text shows the title "Your signed copy is ready" with your image.